
こんにちは。
てくさぽBLOGメンバーの岡田です。
IBM WebSphere Hybrid Edition(以下 WSHE)の導入をAzure上で検証してみた3回シリーズの3回目になります。
本記事ではWSHEで利用可能なアプリケーションのうち、Transformation AdvisorとCloud Foundry Migration Runtimeの導入検証を行いました。
WebSphere Hybrid Editionを導入してみた Vol.1 -OpenShift導入編-
WebSphere Hybrid Editionを導入してみた Vol.2 -WebSphere Liberty導入編-
WebSphere Hybrid Editionを導入してみた Vol.3 -アプリ導入編- *本編
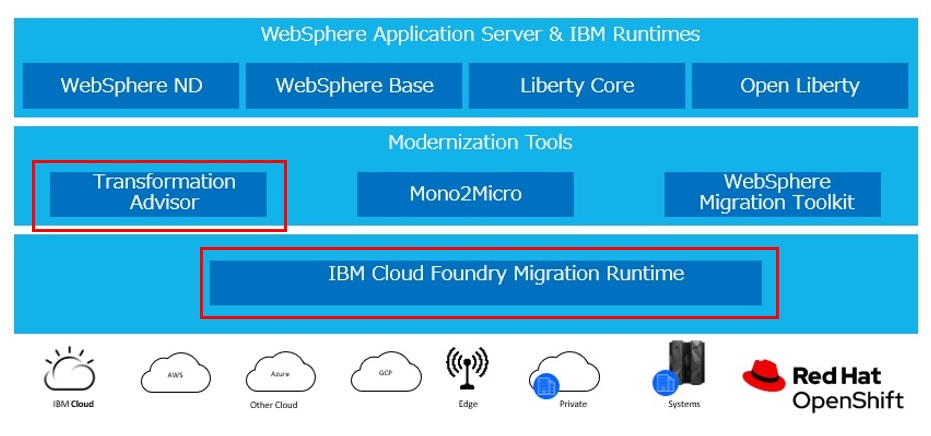
1.WSHEで利用できるアプリケーション
WSHEではWebsphere以外に4つのアプリケーションを利用できます。今回はこのうちTransformation Advisor(以下 TA)とCloud Foundry Migration Runtime(以下 CFMR)の2つを導入してみました。
それぞれのアプリケーションを簡単に説明します。
TA:
オンプレミスで稼働しているJava EEアプリケーションやメッセージング環境をコンテナ環境へ移行・モダナイズできるかを簡単に調査・レポートできるツールです。WebSphereだけでなくWebLogic / Tomcat等のJavaEE環境、IBM MQも分析可能です。
CFMR:
Cloud Foundry アプリケーションを OpenShift 上で変更せずに実行することができる機能です。Cloud Foundryを利用していた管理者・開発者・ユーザーはこれまでのCloud Foundryと同様に利用できます。
2.事前準備
検証を行うにあたり、以下を用意しました。
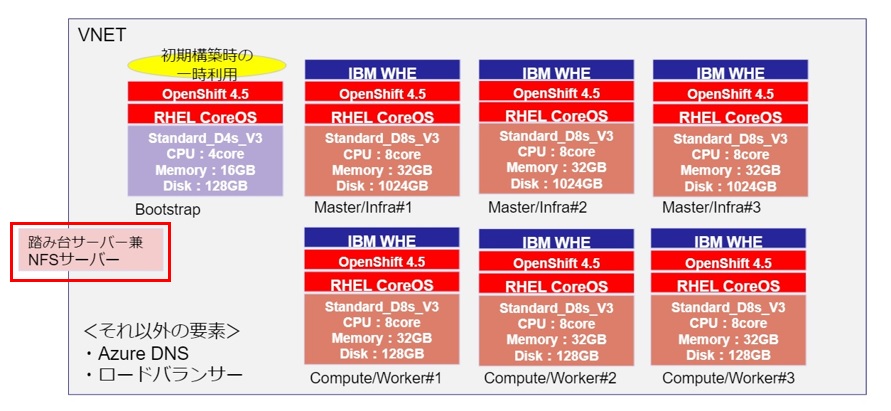
・踏み台サーバー兼NFSサーバー・・・今回はAzure上にRHEL8の仮想サーバーを作成し、リモートからこのサーバーに接続して作業しました。Persistent VolumeがTAの前提環境として必要になるため、今回は作業用サーバー上でNFSサーバーを起動し、OpenshiftのワーカーノードからNFSマウントできることまで事前に確認しました。
・IBM ID ・・・ ライセンス・キーの入手に必要です。
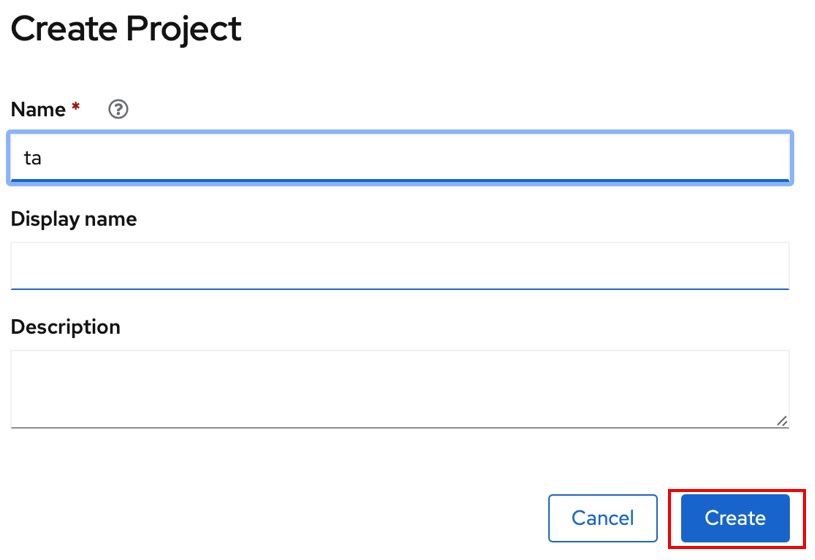
・TA用プロジェクト・・・今回は”ta”という名前で事前にOpenshift Webコンソールにて作成しました。作成手順は以下になります。
(1)Openshift Webコンソールにて、Home-Projectsを選択します。画面右にある「Create Project」ボタンをクリックします。

(2)名前(Name)に「ta」と入力して「Create」ボタンをクリックします。
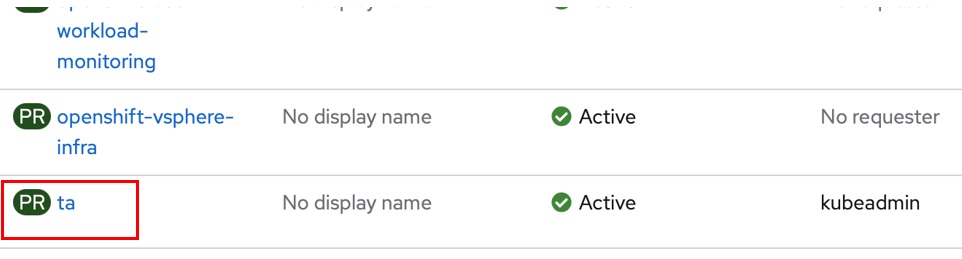
(3)Projectsのリストに作成した「ta」があることを確認します。
3.導入検証実施
IBM Cloud Pak CLI (cloudctl)を使用してコマンドラインから導入します。
以下の手順で導入を実施しました。
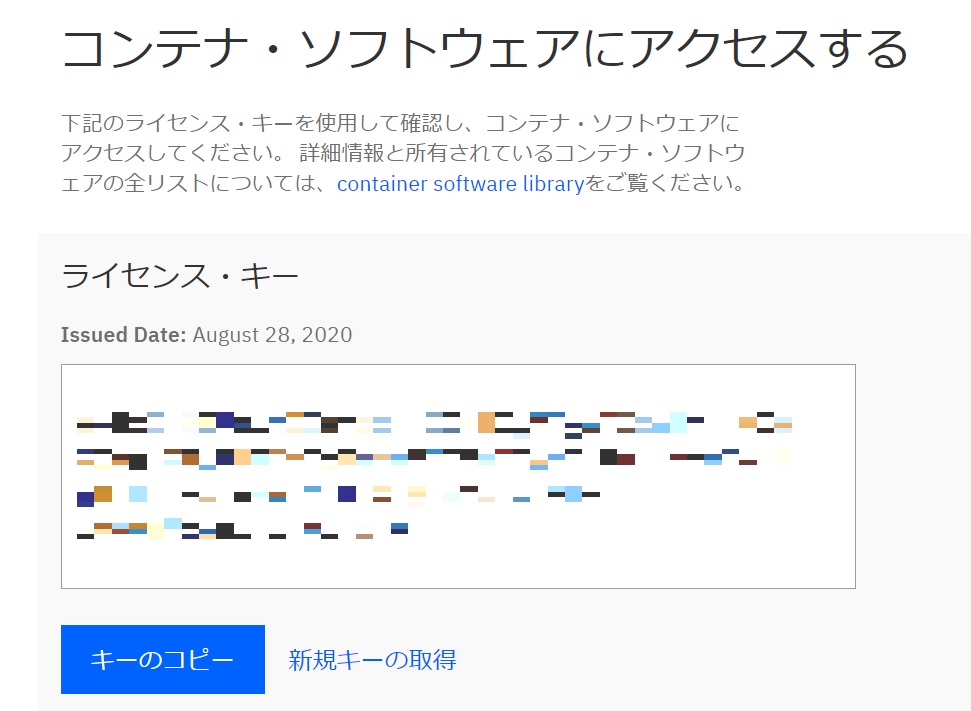
(1)ライセンス・キーの入手
以下のサイトにIBM IDでログインし、ライセンス・キーを入手します。ライセンス・キーが表示されたら「キーのコピー」をクリックして、ライセンス・キーを控えておきます。
https://myibm.ibm.com/products-services/containerlibrary
(2) cloudctl ツールのダウンロードとインストール
・cloudctlコマンドをダウンロードします。
| $ curl -L https://github.com/IBM/cloud- % Total % Received % Xferd Average Speed Time Time Time Current Dload Upload Total Spent Left Speed 100 155 100 155 0 0 593 0 –:–:– –:–:– –:–:– 596 100 635 100 635 0 0 1306 0 –:–:– –:–:– –:–:– 1306 100 12.2M 100 12.2M 0 0 6794k 0 0:00:01 0:00:01 –:–:– 11.2M $ |
・ダウンロードしたファイルを解凍し、パスの通っているディレクトリに移動し、実行できることを確認します。
| $ tar zxvf ./cloudctl-linux-amd64.tar.gz cloudctl-linux-amd64 $ sudo mv ./cloudctl-linux-amd64 /usr/local/bin/cloudctl [sudo] xxx のパスワード: $ which cloudctl /usr/local/bin/cloudctl $ cloudctl NAME: cloudctl – A command line tool to interact with IBM Cloud Platform Common Services and IBM Cloud PrivateUSAGE: [environment variables] cloudctl [global options] command [arguments…] [command options](以下、省略) |
(3)WebSphere Hybrid EditionのCASE アーカイブをダウンロード
TAとCFMRの両方のプログラムが含まれているCASE(ContainerApplication Software for Enterprises)アーカイブをダウンロードします。コマンド出力がすべて”Success”となっていることを確認します。
| $ cloudctl case save –case https://github.com/IBM/cloud-pak/raw/master/repo/case/ibm-websphere-hybrid-1.0.0.tgz –outputdir ./wshe-case
Downloading and extracting the CASE … |
(4)CASEアーカイブの検証
・CP_USER および CP_APIKEY 環境変数を設定
| $ export CP_USER=cp $ export CP_APIKEY=<ライセンス・キー> |
・oc クライアントを使用して、クラスターにログイン
| $ oc login -u kubeadmin -p <パスワード> https://api.nicpwhecluster.xxx.com:6443 Login successful.You have access to 59 projects, the list has been suppressed. You can list all projects with ‘oc projects’Using project “ta”. $ |
・CASE アーカイブを検証し、ライセンスを表示
これ以降のcloudctlのコマンドはroot権限で実行しています。最後に”CASE launch script completed successfully OK”と出力されていることを確認します。
| # cloudctl case launch –case wshe-case/ibm-websphere-hybrid-1.0.0.tgz –inventory installProduct –action initialize –args “–viewLicense” Welcome to the CASE launcher Attempting to retrieve and extract the CASE from the specified location [?] CASE has been retrieved and extracted Attempting to validate the CASE [?] CASE has been successfully validated Attempting to locate the launch inventory item, script, and action in the specified CASE [?] Found the specified launch inventory item, action, and script for the CASE Attempting to check the cluster and machine for required prerequisites for launching the item Checking for required prereqs…(途中省略)Kubernetes RBAC Prerequisite Verbs Result Reason *.*/ * trueUser permissions result: OK [?] Cluster and Client Prerequisites have been met for the CASE Running the CASE installProduct launch script with the following action context: initialize Executing inventory item installProduct, action initialize : launch.sh [?] CASE launch script completed successfully OK # |
(5)インストール構成ファイルを解凍し、確認
tgzファイルを解凍し、展開されたファイルを確認します。
| # cloudctl case launch –case wshe-case/ibm-websphere-hybrid-1.0.0.tgz –inventory installProduct –action initialize –args “–acceptLicense” Welcome to the CASE launcher Attempting to retrieve and extract the CASE from the specified location [?] CASE has been retrieved and extracted Attempting to validate the CASE [?] CASE has been successfully validated Attempting to locate the launch inventory item, script, and action in the specified CASE [?] Found the specified launch inventory item, action, and script for the CASE Attempting to check the cluster and machine for required prerequisites for launching the item Checking for required prereqs…Prerequisite Result Client docker CLI must meet the following regex: version (1[7-9]|[2-9][0-9]). false Client podman CLI must meet the following regex: version 1.([4-9]|[1-8][0-9]|9[0-9]). trueRequired prereqs result: OK Checking user permissions…Kubernetes RBAC Prerequisite Verbs Result Reason *.*/ * trueUser permissions result: OK [?] Cluster and Client Prerequisites have been met for the CASE Running the CASE installProduct launch script with the following action context: initialize Executing inventory item installProduct, action initialize : launch.sh [?] CASE launch script completed successfully OK # ls -al ./wshe-case/ total 824 drwxr-xr-x. 3 root root 4096 Mar 5 08:15 . dr-xr-x—. 7 root root 198 Mar 9 05:04 .. drwxr-xr-x. 2 root root 6 Mar 5 08:15 charts -rw-r–r–. 1 root root 32 Mar 5 08:15 ibm-cfmr-1.0.0-charts.csv -rw-r–r–. 1 root root 10274 Mar 5 08:15 ibm-cfmr-1.0.0-images.csv -rw-r–r–. 1 root root 223820 Mar 5 08:15 ibm-cfmr-1.0.0.tgz -rw-r–r–. 1 root root 32 Mar 5 08:15 ibm-transadv-2.4.1-charts.csv -rw-r–r–. 1 root root 4216 Mar 5 08:15 ibm-transadv-2.4.1-images.csv -rw-r–r–. 1 root root 506537 Mar 5 08:15 ibm-transadv-2.4.1.tgz -rw-r–r–. 1 root root 32 Mar 5 08:15 ibm-websphere-hybrid-1.0.0-charts.csv -rw-r–r–. 1 root root 1195 Mar 5 08:15 ibm-websphere-hybrid-1.0.0-images.csv -rw-r–r–. 1 root root 67571 Mar 5 08:15 ibm-websphere-hybrid-1.0.0.tgz# |
(6)cloudctl CASE インストーラーを実行
最後に”CASE launch script completed successfully OK”と出力されていることを確認します。
| # cloudctl case launch –case wshe-case/ibm-websphere-hybrid-1.0.0.tgz –inventory installProduct –action install –args “–acceptLicense” Welcome to the CASE launcher Attempting to retrieve and extract the CASE from the specified location [?] CASE has been retrieved and extracted Attempting to validate the CASE [?] CASE has been successfully validated Attempting to locate the launch inventory item, script, and action in the specified CASE [?] Found the specified launch inventory item, action, and script for the CASE Attempting to check the cluster and machine for required prerequisites for launching the item Checking for required prereqs…Prerequisite Result openshift Kubernetes version must be >=1.17.0, <1.19.0 true Kubernetes node resource must match a set of expressions defined in prereqs.yaml true Client docker CLI must meet the following regex: version (1[7-9]|[2-9][0-9]). false Client podman CLI must meet the following regex: version 1.([4-9]|[1-8][0-9]|9[0-9]). trueRequired prereqs result: OK Checking user permissions…Kubernetes RBAC Prerequisite Verbs Result Reason *.*/ * trueUser permissions result: OK [?] Cluster and Client Prerequisites have been met for the CASE Running the CASE installProduct launch script with the following action context: install Executing inventory item installProduct, action install : launch.shStarting Install ***************************************************************Login To Cluster… okstdout: Using provided cluster configuration. Logged in as kube:admin.Get Cluster Server Address… okstdout: https://api.nicpwhecluster.xxx.com:6443Save Cluster Server Address… okCheck Cluster Version… okstdout: OpenShift 4.5.31 detected.Check Cluster Administrator Role… okstdout: yesGet Authorization Endpoint… okstdout: https://oauth-openshift.apps.nicpwhecluster.xxx.com/oauth/authorizeSave Authorization Endpoint… okGet Default Cluster Subdomain… okstdout: apps.nicpwhecluster.azure-cloudpak-nicptest.comSet Cluster Subdomain… okCheck Entitled Registry Variables… okGet Existing Operator Subscriptions… okstdout: { “other”: {} }Set Subscriptions Properties… okSwitch To Transformation Advisor Project… donestdout: Switched to ta project.Populate Transformation Advisor Operator Configuration… doneCreate Pull Secret… donestdout: secret/wshe-pull-secret createdInstall Transformation Advisor Operator… donestdout: operatorgroup.operators.coreos.com/ta created subscription.operators.coreos.com/wshe-transadv createdConfigure Transformation Advisor Service Account… donestdout: clusterrole.rbac.authorization.k8s.io/cluster-admin added: “system:serviceaccount:ta:ta-operator”stderr: Warning: ServiceAccount ‘ta-operator’ not foundAdd Security Context Constraints To User… donestdout: securitycontextconstraints.security.openshift.io/anyuid added to: [“system:serviceaccount:ta:default”]Check for Transformation Advisor Operator… okGet wshe-transadv ClusterServiceVersion… Retrying… (1 of 51) Retrying… (2 of 51) okstdout: ta-operator.v2.3.4Check ta-operator.v2.3.4 ClusterServiceVersion… Retrying… (1 of 51) Retrying… (2 of 51) Retrying… (3 of 51) Retrying… (4 of 51) Retrying… (5 of 51) Retrying… (6 of 51) Retrying… (7 of 51) Retrying… (8 of 51) okSwitch To Cloud Foundry Migration Runtime Project… donestdout: Created cfmr-operator project.Create Pull Secret… donestdout: secret/wshe-pull-secret createdConfigure Cloud Foundry Migration Runtime Service Account… donestdout: clusterrole.rbac.authorization.k8s.io/cluster-admin added: “system:serviceaccount:cfmr-operator:wshe-ibmcfmrprod-ibm-cfmr-serviceaccount” clusterrole.rbac.authorization.k8s.io/self-provisioner added: “system:serviceaccount:cfmr-operator:wshe-ibmcfmrprod-ibm-cfmr-serviceaccount”stderr: Warning: ServiceAccount ‘wshe-ibmcfmrprod-ibm-cfmr-serviceaccount’ not found Warning: ServiceAccount ‘wshe-ibmcfmrprod-ibm-cfmr-serviceaccount’ not foundAdd Security Context Constraints… donestdout: securitycontextconstraints.security.openshift.io/restricted added to: [“system:serviceaccount:cfmr-operator:wshe-ibmcfmrprod-ibm-cfmr-serviceaccount”]Install Cloud Foundry Migration Runtime Operator… donestdout: customresourcedefinition.apiextensions.k8s.io/ibmcfmrprods.cfmr.ibm.com created serviceaccount/cfmr-operator created clusterrole.rbac.authorization.k8s.io/cfmr-operator created clusterrolebinding.rbac.authorization.k8s.io/cfmr-operator created deployment.apps/cfmr-operator createdCheck for Cloud Foundry Migration Runtime Operator… Retrying… (1 of 51) Retrying… (2 of 51) Retrying… (3 of 51) Retrying… (4 of 51) Retrying… (5 of 51) okstdout: All cfmr-operator pods are running and are ready.Switch To Cloud Foundry Migration Runtime Project… donestdout: Switched to cfmr-operator project.Get Default Pull Secret… skippedSet Project Pull Secret… skippedPopulate Cloud Foundry Migration Runtime Custom Resource… doneInstall Cloud Foundry Migration Runtime Resource… donestdout: ibmcfmrprod.cfmr.ibm.com/wshe-ibmcfmrprod createdWait for Cloud Foundry Migration Runtime Install… Retrying… (1 of 301) Retrying… (2 of 301) Retrying… (3 of 301) (途中省略) Retrying… (79 of 301) Retrying… (80 of 301) Retrying… (81 of 301) Retrying… (82 of 301) Retrying… (83 of 301) okstdout: The wshe-ibmcfmrprod-ibm-cfmr job has completed successfullystderr: + NAMESPACE=cfmr-operator + LABEL_QUERY=release=wshe-ibmcfmrprod + sleep 10 ++ oc -n cfmr-operator get job -l release=wshe-ibmcfmrprod -o ‘jsonpath={range .items[*]}{@.metadata.name}{end}’ + JOBS=wshe-ibmcfmrprod-ibm-cfmr + for JOB_ENTRY in $JOBS ++ oc -n cfmr-operator get job wshe-ibmcfmrprod-ibm-cfmr -o ‘jsonpath={.status.active}’ + JOB_ACTIVE= ++ oc -n cfmr-operator get job wshe-ibmcfmrprod-ibm-cfmr -o ‘jsonpath={.status.failed}’ + JOB_FAILED= ++ oc -n cfmr-operator get job wshe-ibmcfmrprod-ibm-cfmr -o ‘jsonpath={.status.succeeded}’ + JOB_SUCCEEDED=1 + ‘[‘ -n ” ‘]’ + ‘[‘ -n ” ‘]’ + ‘[‘ -n 1 ‘]’ + echo ‘The wshe-ibmcfmrprod-ibm-cfmr job has completed successfully’ + exit 0Get Cloud Foundry Migration Runtime UI Route… donestdout: xx.xx.xx.xx(外部IPアドレス) set_fact… Switch To Transformation Advisor Project… stdout: Get Default Pull Secret… Set Project Pull Secret… Generate Certificate and Create Transformation Advisor Secret… stdout: Load Generated Transformation Advisor Certificate… Populate Transformation Advisor Custom Resource… Load Transformation Advisor Custom Resource… Customize Transformation Advisor Custom Resource… Check Transformation Advisor Custom Resource… msg: Install Transformation Advisor Custom Resource… stdout: Check For Transformation Advisor UI… stdout: Check For Transformation Advisor Database… stdout: Check For Transformation Advisor Server… stdout: Annotate Transformation Advisor Deployments… stdout: Get Transformation Advisor UI Route… stdout: set_fact… Mark Installation Complete… Install successful ************************************************************* Installation complete. The IBM Transformation Advisor UI is available at: https://ta-apps.apps.nicpwhecluster.xxx.com The IBM Cloud Foundry Migration Runtime UI is available at: https://ui.xx.xx.xx.xx.nip.io [?] CASE launch script completed successfully # |
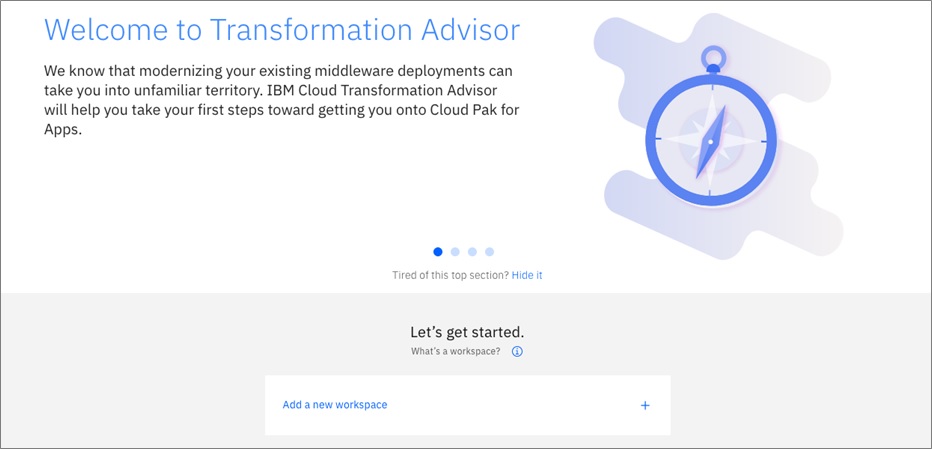
コマンド出力の最後にTAとCMFRそれぞれのアクセスするURLが表示されますのでメモしておきます。
(7)接続確認
TA:以下のURLにWebブラウザでアクセスしてページが表示されることを確認します。
https://ta-apps.apps.nicpwhecluster.xxx.com
CMFR:こちらも同様に以下のURLにアクセスしてページが表示されることを確認します。
https://ui.<外部IPアドレス>.nip.io
これで導入検証は完了です。
補足
以上が導入検証を実施した際の内容となりますが、現在は一部手順が更新されています。TAとCFMRは個別で導入するようにマニュアルが更新されています。これから導入される方は以下のマニュアルを確認の上、実施してみてください。
https://www.ibm.com/docs/en/websphere-hybrid?topic=installation
最後に
いかがでしたでしょうか。WindowsアプリやLinuxのrpmパッケージのインストールのようには簡単ではないので、すこし難しいかなと感じました。cloudctlコマンドとCASEの利用はTA、CFMRそれぞれ単体の導入でも同様に行いますので、その際にこの記事が参考になればと思います。
ここまでお読みいただきありがとうございました。
お問い合わせ
この記事に関するご質問は下記までご連絡ください。
エヌアイシー・パートナーズ株式会社
技術支援本部
E-Mail:nicp_support@NIandC.co.jp